Use the following guidelines to achieve the best results when converting projects from Qt 3D Studio to Qt Design Studio.
最佳实践
-
If something in UI is clearly 2D, do not import it from Qt 3D Studio presentation. Implement it directly in Qt Design Studio.
-
QML streams cannot be imported as QML elements directly into Qt Design Studio. They need to be copied manually since there is no import functionality for QML files in Qt Design Studio.
-
If you do import the whole Qt 3D Studio project (
.uia
file), use only the parts you actually need from it. Use
Move Component Into Separate File
for the parts you need, and eventually delete all the rest from the project structure.
-
There are extra levels of
Node
elements in most imported QML files, and they should be removed for improved performance. As a rule of thumb, each Node that has only one child is considered an extra level that should be deleted.
-
Qt 3D Studio
slides
become Qt Design Studio
states
, and there may be problems with state changes. Always go through each of the state changes to make sure they work correctly.
Importing Assets
自定义材质
Custom materials (
something.shader
files in Qt 3D Studio) are not imported correctly, and have to be fixed manually.
-
They are imported as
CustomMaterial { id: something; source: "something" }
that neither works nor does anything.
-
Remove the
source: "something"
altogether.
-
Vertex shader part from the
something.shader
needs to be copied to
Shader { stage: Shader.Vertex; shader: "vertex shader code here" }
inside the
CustomMaterial
. Fragment shader part needs to be copied to
Shader { stage: Shader.Fragment; shader: "fragment shader code here" }
.
-
Properties in
元数据
of the
something.shader
need to be introduced manually as QML properties of the same name and correct type inside the
CustomMaterial
元素。
-
Add
import QtQuick3D.Materials 1.15
import statement to files that have
CustomMaterial
元素。
-
If custom material uses textures, they are not imported automatically and must be manually added to the project structure.
-
Many custom materials are not rendered in
3D Editor
or
Form Editor
views due to an open bug in Qt Design Studio 1.5. The project needs to be run for them to appear.
Standard Materials
Some properties of standard materials may not be imported correctly.
-
The sensible value ranges of some properties may have changed between Qt 3D Studio and Qt Design Studio and need to be redefined manually.
-
Extra properties may be added and can be removed manually.
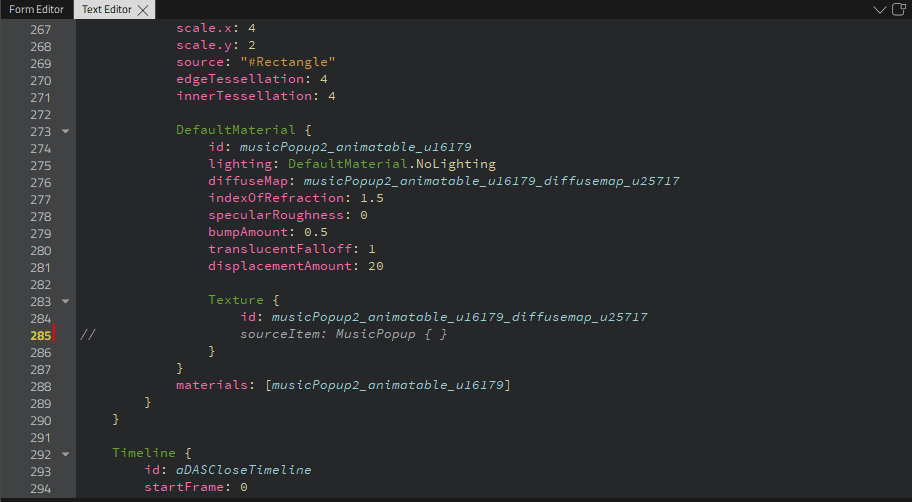
Models
Models have some extra properties (tessellations), which can be removed.
Example: Converting MyOwnCluster Project from Qt 3D Studio to Qt Design Studio
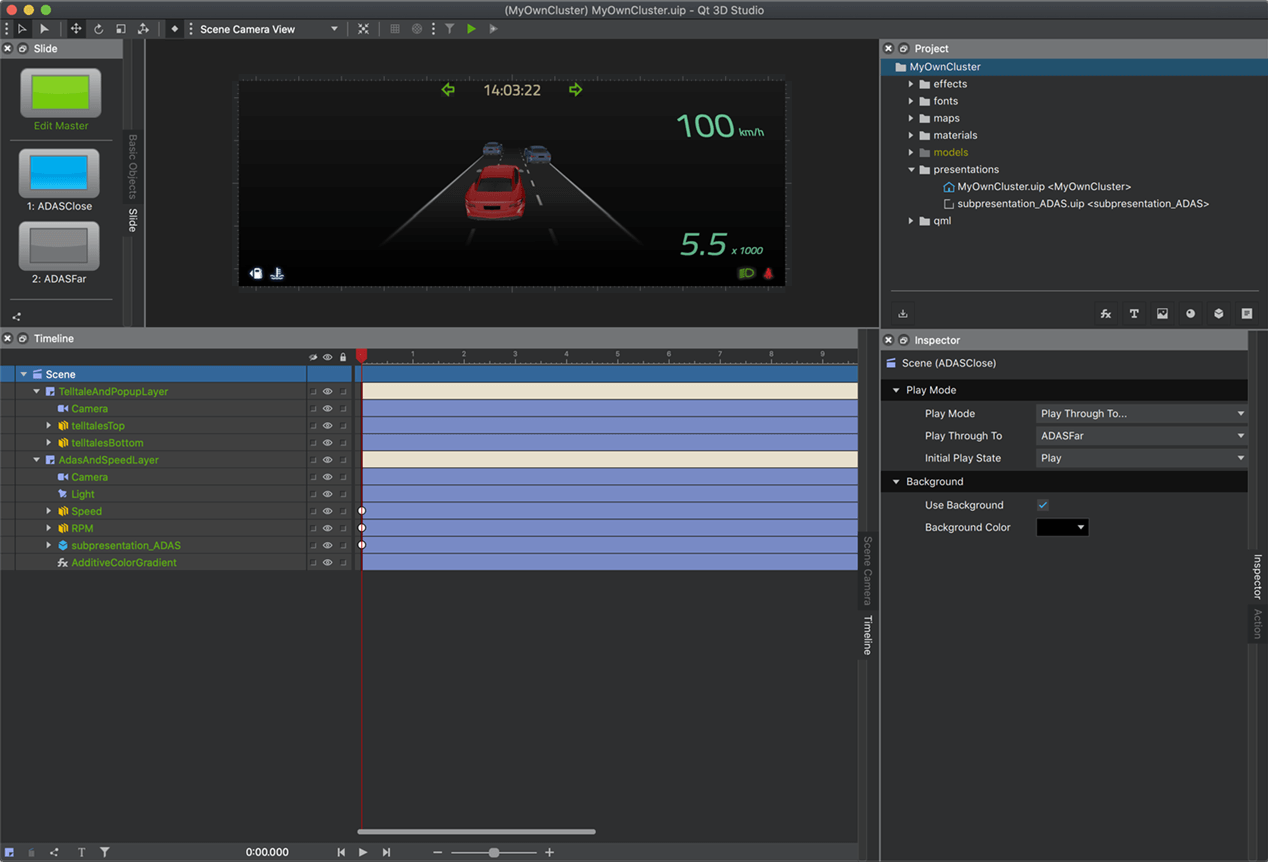
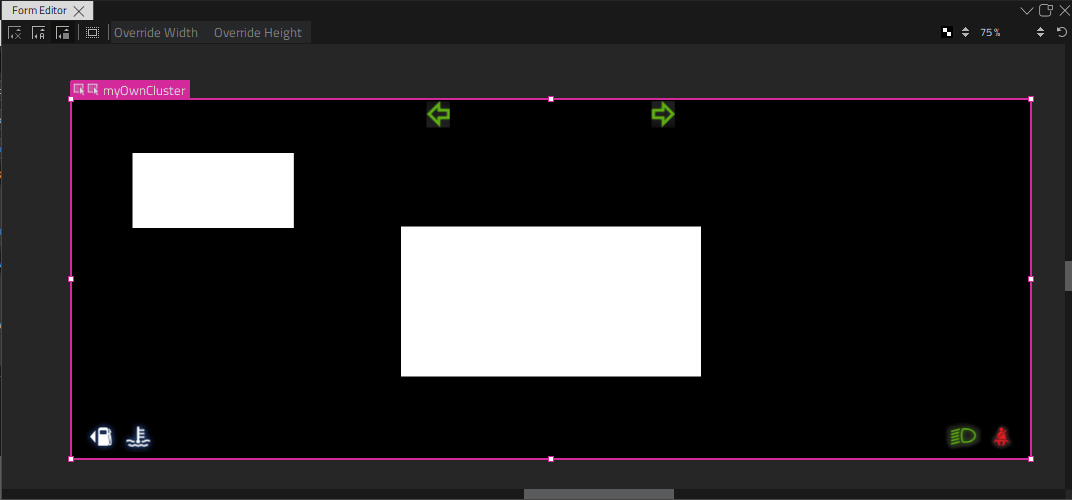
My Own Cluster project in Qt 3D Studio
The following steps describe how to convert the My Own Cluster project from Qt 3D Studio to Qt Design Studio.
Creating a New Project in Qt Design Studio
-
To create a new project in Qt Design Studio, select
File > New File or Project
, or select
New Project
in the Welcome mode.
-
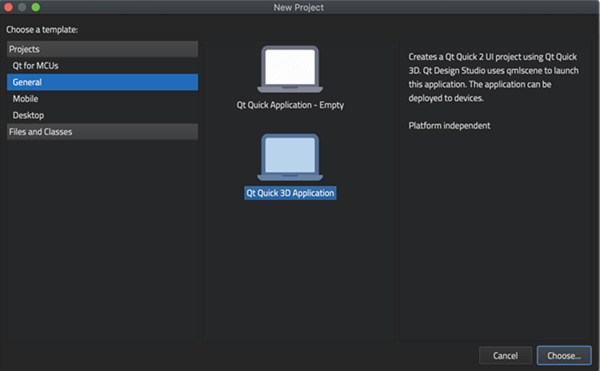
Creating a new project in Qt Design Studio is aided by a wizard that contains templates for creating different types of projects. Choose the
Qt Quick 3D Application
template to get started with your new 3D project.
-
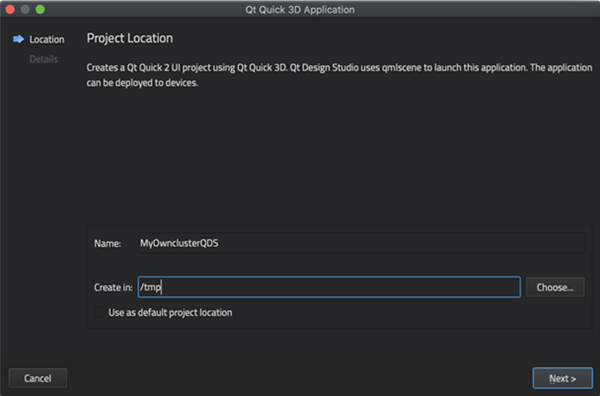
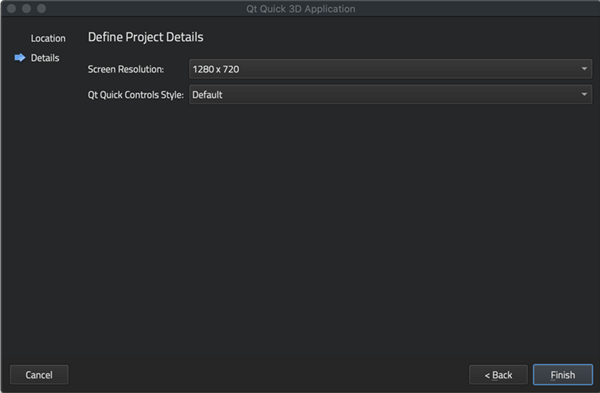
在
Name
field, enter a name for the project. In the
Create in
field, enter the path for the project files, and then select
下一
.
-
在
Screen resolution
field, select the screen resolution for previewing the UI on the desktop or on a device. You must select one of the predefined screen resolutions, which will later be altered to match the width and height of the original project. In the
Qt Quick Controls Style
field, select one of the predefined UI styles to use, and then select
Finish
.
-
Your new project has now been created. For more information on creating projects in Qt Design Studio, see
创建工程
. For more information on how to get started with Qt Design Studio, see
快速入门
.
Getting Started with MyOwnCluster
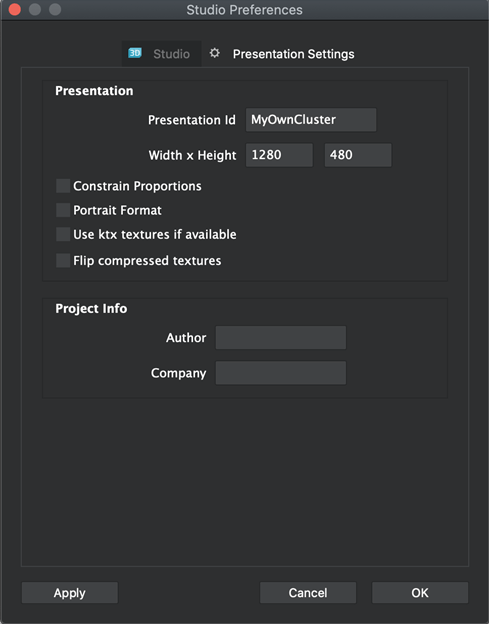
-
Return to your project in Qt 3D Studio to check the size of the presentation. Select
Edit
>
Presentation Settings
to see the values for
Width x Height
.
-
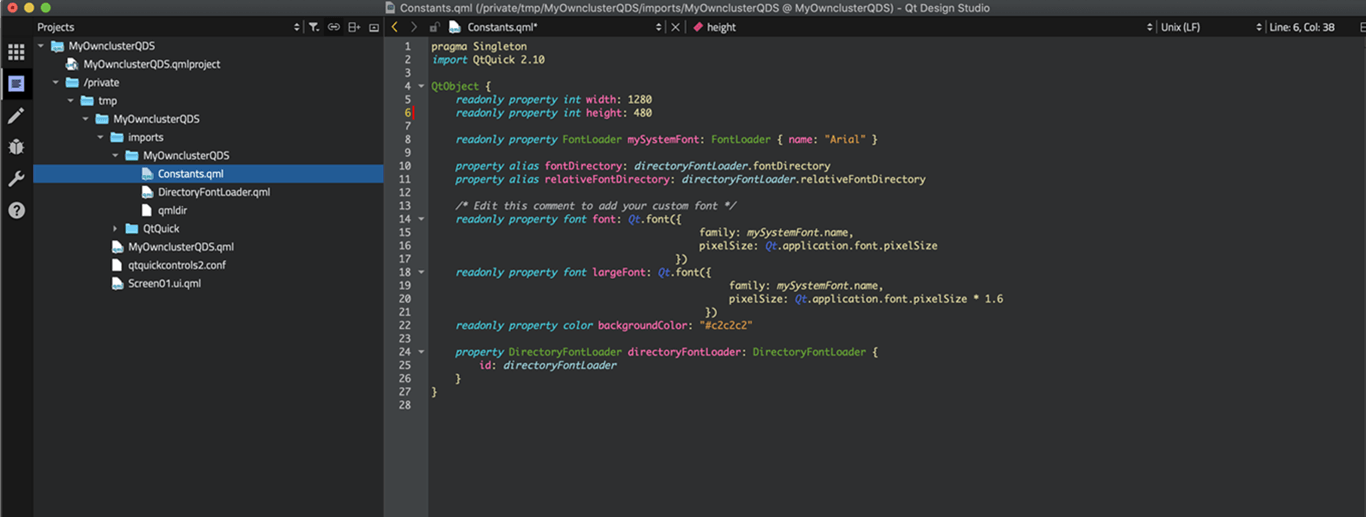
Adjust the canvas size of your project in Qt Design Studio according to the screen size in Qt 3D Studio presentation by editing the
Constants.qml
file in
文本编辑器
. If you cannot see the
文本编辑器
view, select
Window
>
Views
, and then select the
文本编辑器
checkbox. In the
Projects
view, open the imports subfolder, then the subfolder named after your project, and double-click
Constants.qml
. Edit the values for
readonly property int width
and
readonly property int height
to match the
Width x Height
values in Qt 3D Studio presentation.
-
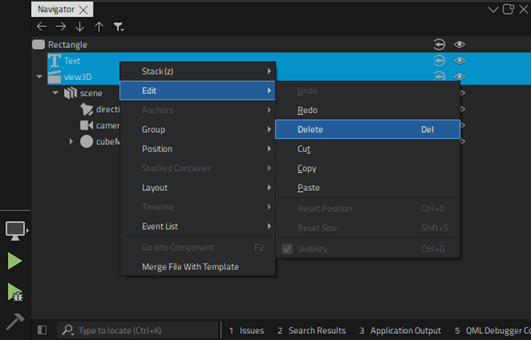
To delete the placeholders created by the wizard, multiselect
Text
and
view3D
components (
Ctrl
+ mouse left click) in
Navigator
, then right click on the selected items, and select
Edit
>
Delete
.
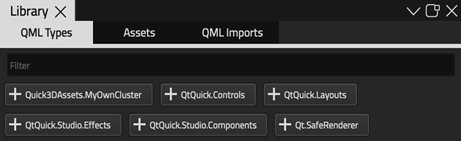
Importing Assets
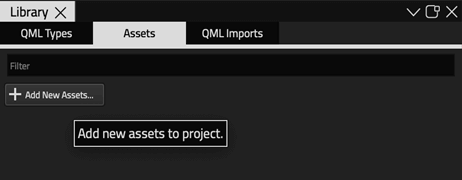
-
在
Library
view, select
Add New Assets
.
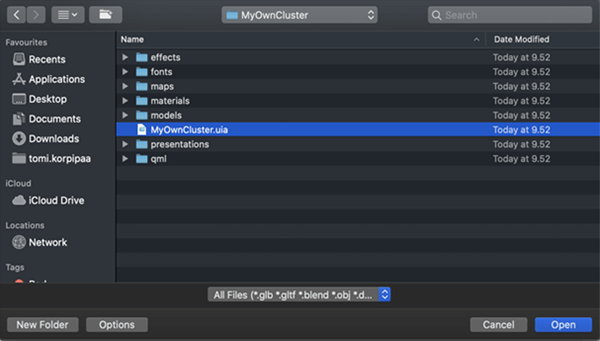
-
Select the
.uia
file for the Qt 3D Studio project you wish to import, and then select
Open
.
-
选择
Import
, and after the import is complete, select
Close
.

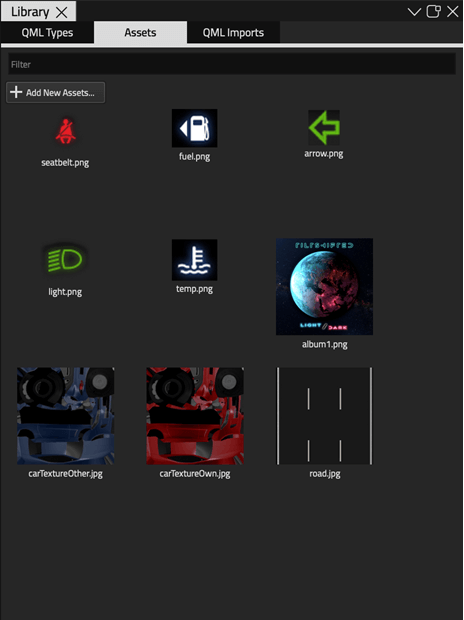
-
The 2D assets imported from Qt 3D Studio now appear in
Library
under
Assets
tab.
-
The QML components generated from the imported Qt 3D Studio project now appear as available imports in
Library
under
QML 类型
. Select
Quick3DAssets.MyOwnCluster
to import them to your project.
-
The imported QML types now appear in
Library
and can be added to the project.
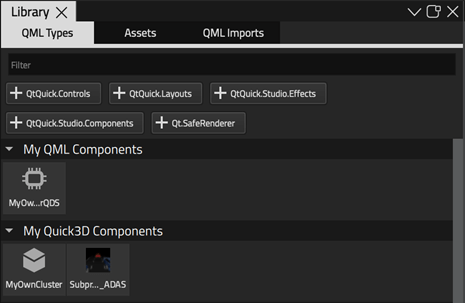
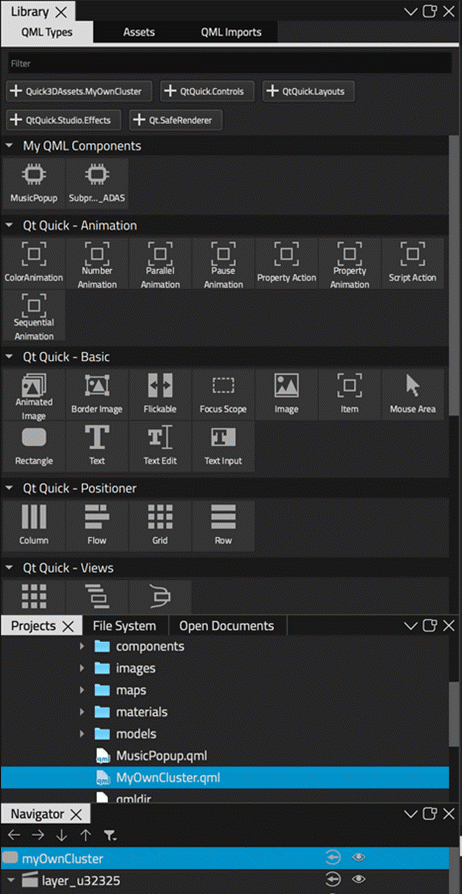
Adding Components to the Project
-
Drag
MyOwnCluster
from
My Quick3D Components
in
Library
to
Form Editor
.
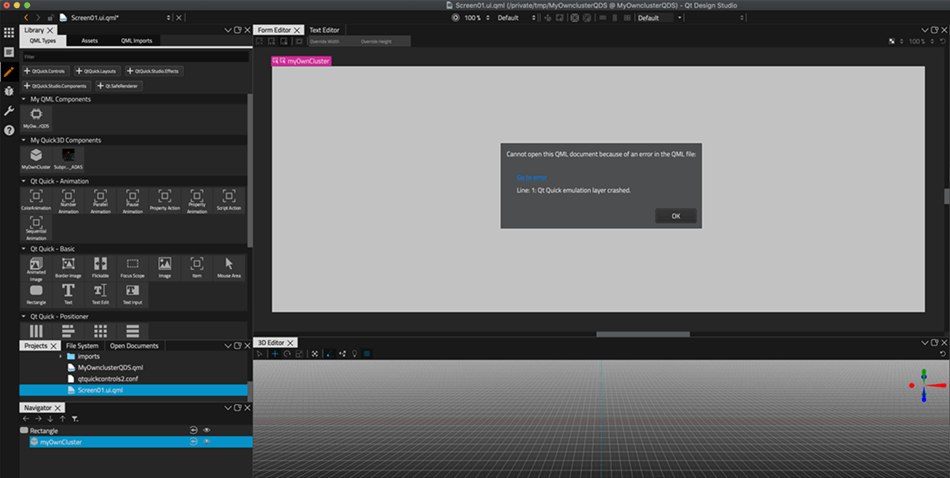
-
在
Navigator
, right click on myOwnCluster and select
Go into Component
.
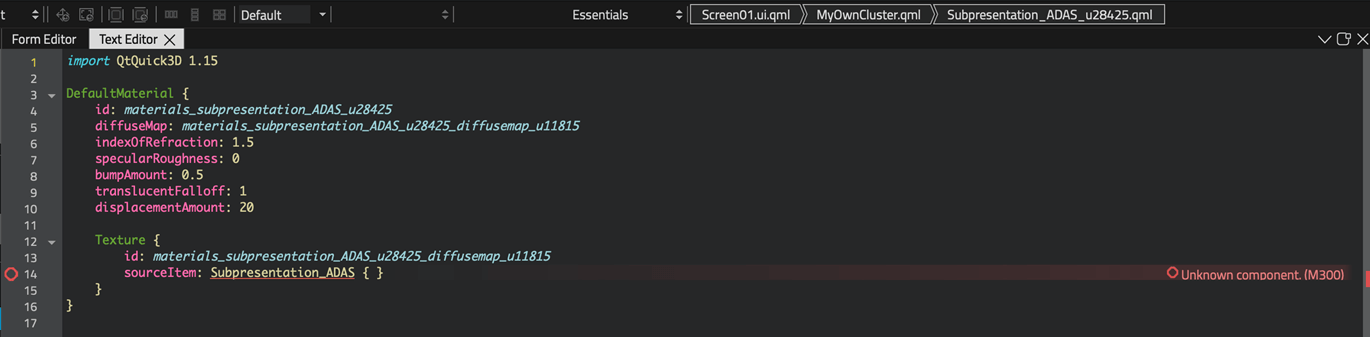
-
Find the offending line in
文本编辑器
.

-
Comment out the offending line by placing two slashes in the beginning of it (or remove the line).
-
In Navigator, go to each component of the project and comment out (or remove) any offending lines you find.
-
You should now see some parts of the project in
Form Editor
.
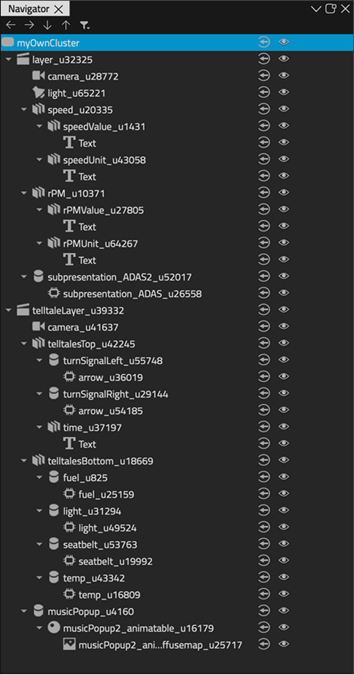
Converting 3D Elements
-
Drag subpresentation_ADAS from
My QML Components
in
Library
into layer folder in
Navigator
.
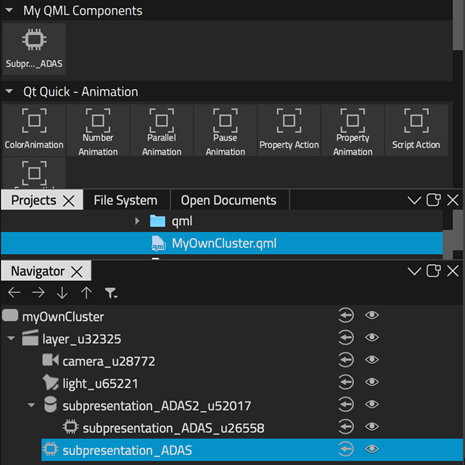
-
To delete the old subpresentation rectangle, right-click on the file name (subpresentation_ADAS2_u52017 in this project), select
Edit
>
Delete
.
-
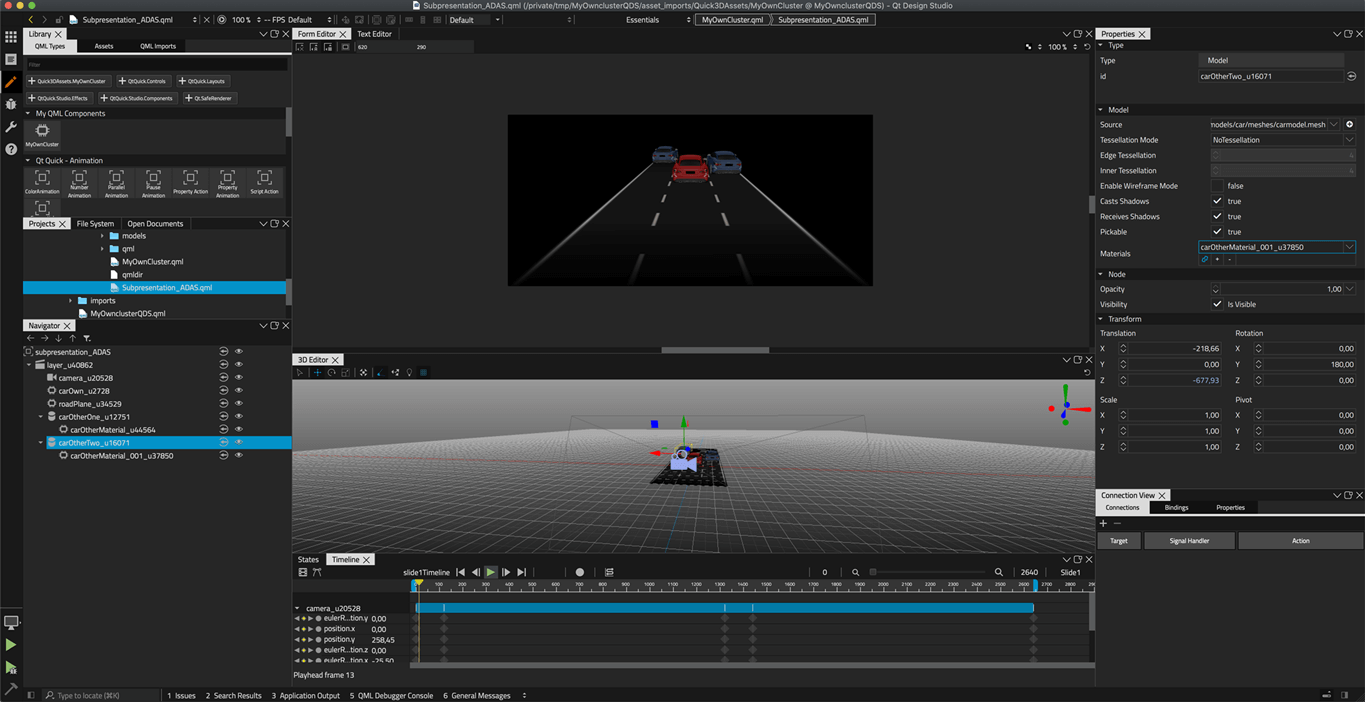
Go into the component subpresentation_ADAS.
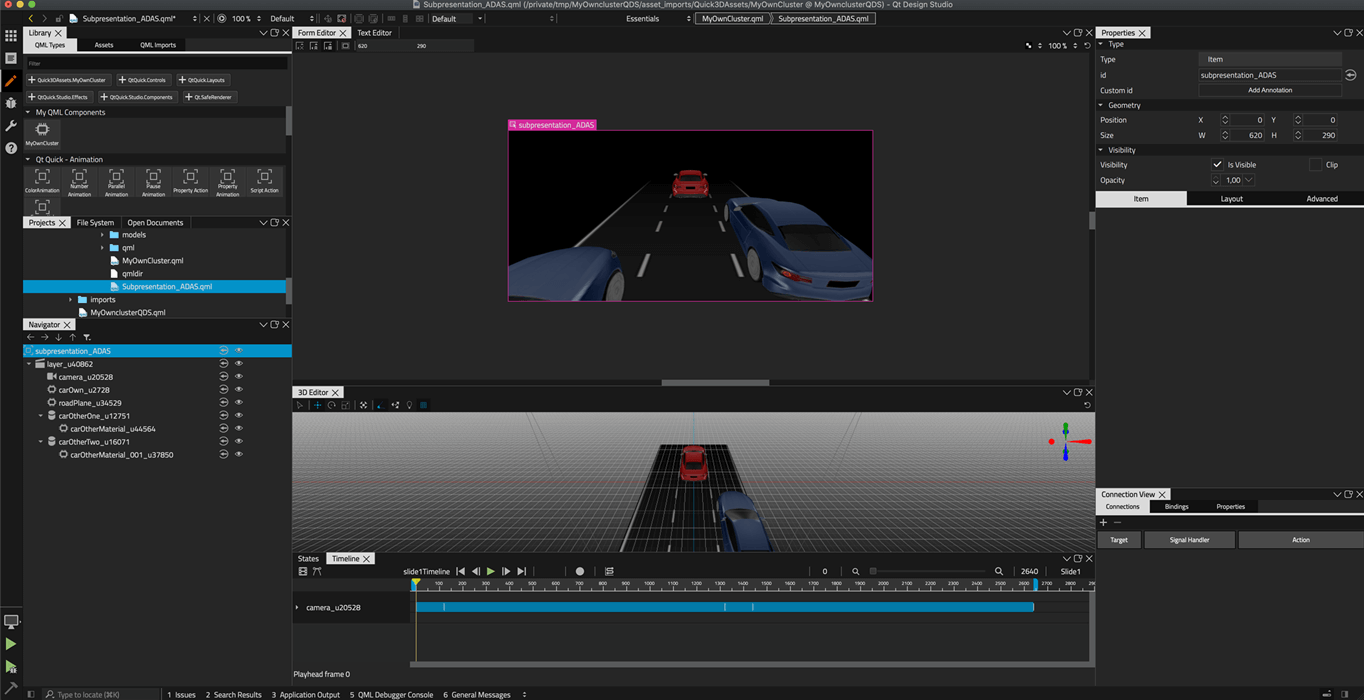
-
Reposition objects and/or camera in
3D Editor
according to the original Qt 3D Studio project. The desired scene may be achieved simply by changing the z position sign from positive to negative, or vice versa, in some cases.
For more information on how to edit a scene in
3D Editor
,见
Working in 3D Editor
.
-
Recreate animations in subpresentation_ADAS according to the original project. For more information on creating animations in Qt Design Studio, see
Creating Animations
.
-
Go to the
时间线
View to review the timeline for the project.

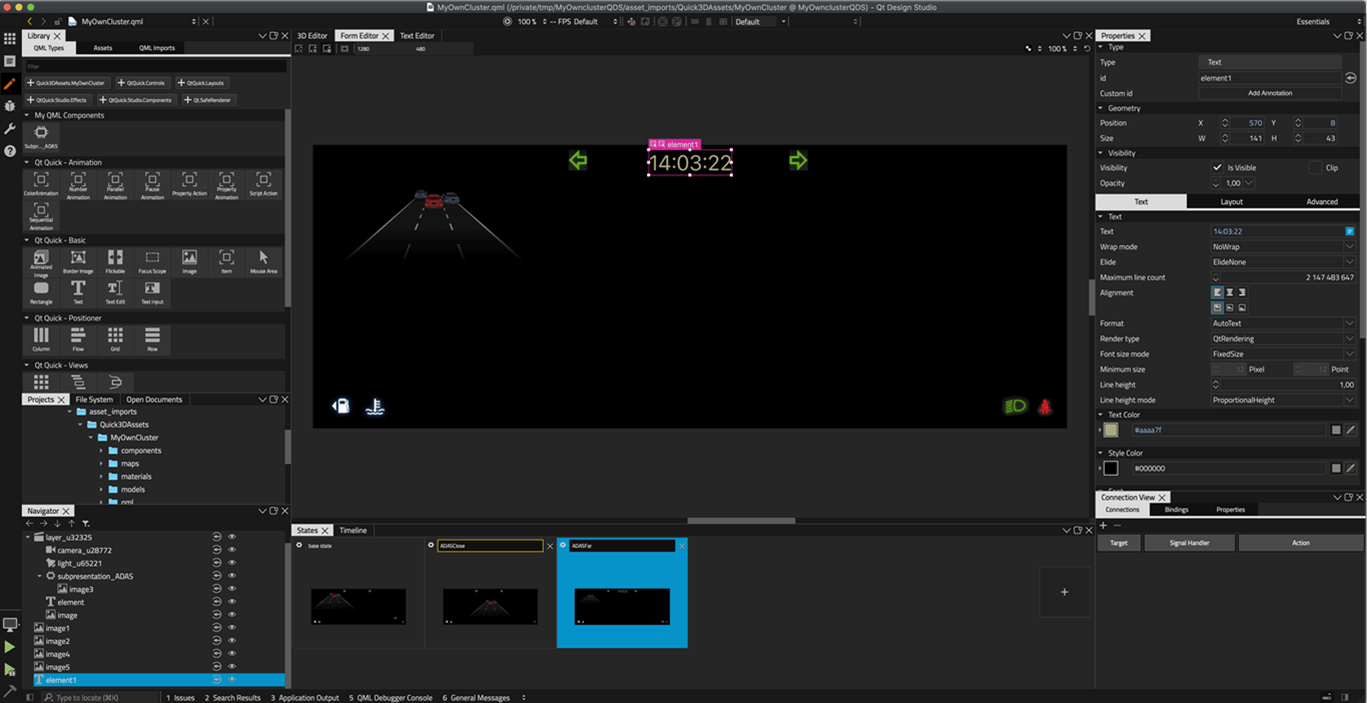
Converting 2D Elements
-
Recreate the 2D elements of the original project (in all layers) using the 2D QML elements available in Qt Design Studio. You can use the imported 2D layer as a guide for recreating the elements. If the 2D elements in the original project have rotations, especially in a 3D layer, make sure to add rotations that mimic the original ones to the Qt Design Studio project. For example, rotation on one axis with perspective camera requires rotation on two axes in pure 2D. You may need to use
文本编辑器
to achieve rotation similar to the rotation of the object in Qt 3D Studio. For more information on specifying advanced transformations on
Items
,见
Transform
.
-
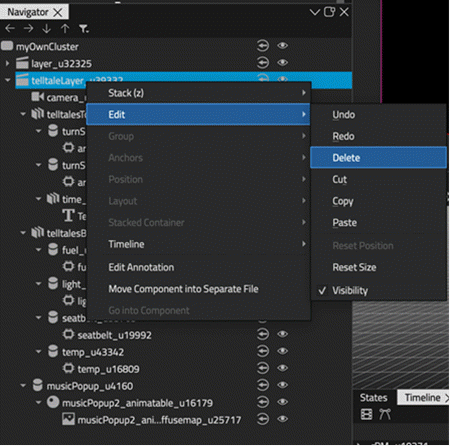
To delete the 2D layer (telltaleLayer_u39332) in
Navigator
after recreating the 2D elements, right-click on the component, and select
Edit
>
Delete
.
-
Next, you need to delete the 2D elements from the 3D layer (speed_u20335 and rPM_u10371 from layer_32325). Right-click on the element, and select
Edit
>
Delete
.

-
Recreate the animations for 2D elements the same way it was done for the 3D elements.
Converting QML Streams
-
Find QML stream files in file explorer.
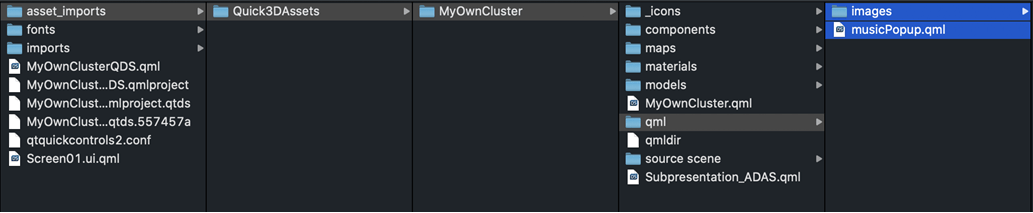
-
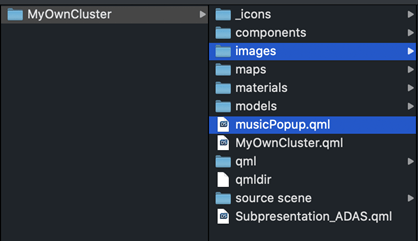
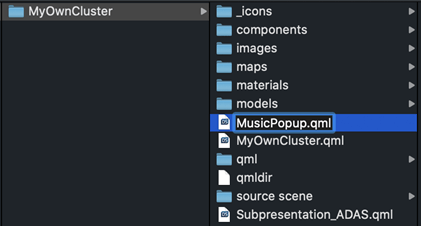
Move the QML stream files under the import's main folder (one level up in this example).
-
Make sure that the QML stream file names start with a capital letter to enable Qt Design Studio to recognize them as QML component files.
-
Return to Qt Design Studio and enter the MyOwnCluster component. The QML stream component now appears in
My QML Components
.
-
Drag and drop the QML stream component to MyOwnCluster in
Navigator
.

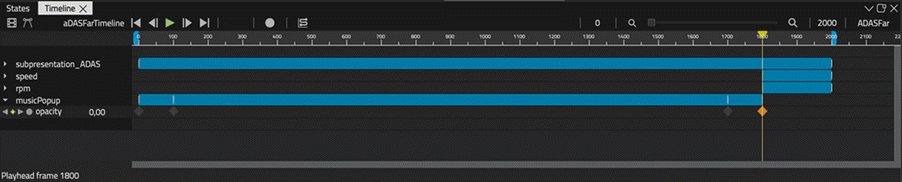
-
Go to the
States
view and use the
Visibility
tab in the
特性
view to make the QML stream component visible only in the correct state.

-
Next, recreate the animations for the QML stream according to the original project.
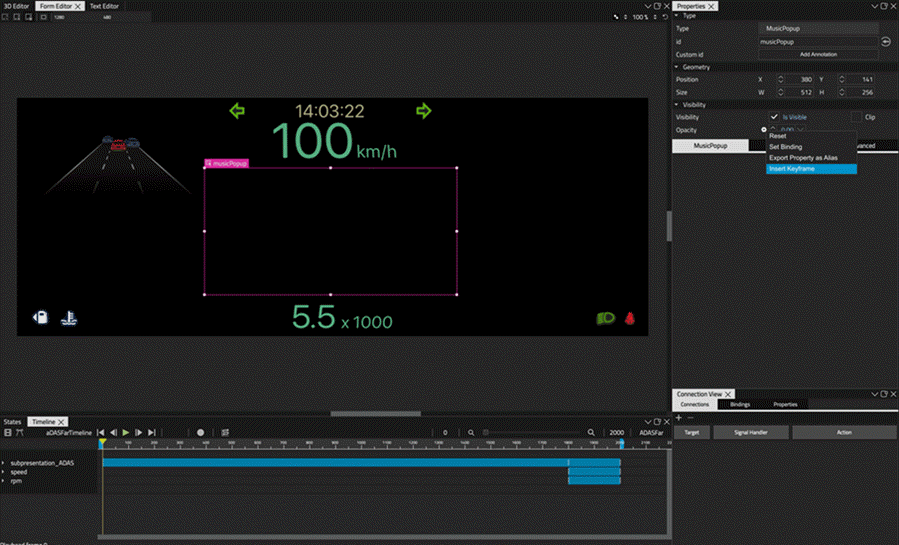
-
Recreate all the keyframes for the imported QML stream that is now a component.
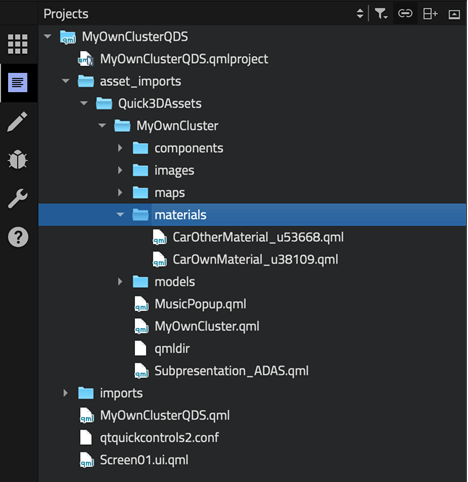
Cleaning Up the Project Structure
-
Go to file explorer and clean up the project structure deleting the folder and files that are not used in the Qt Design Studio project.
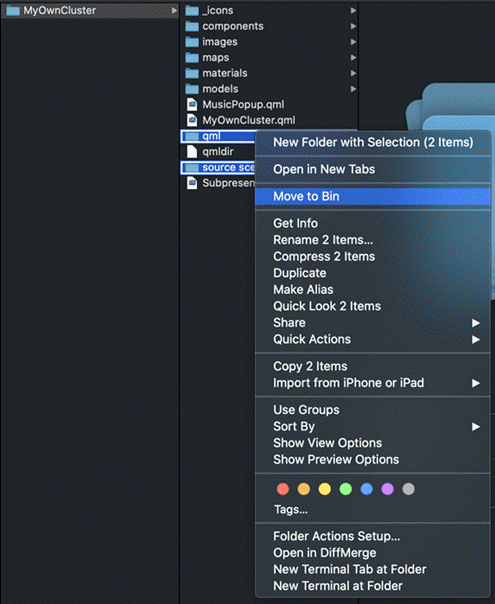
-
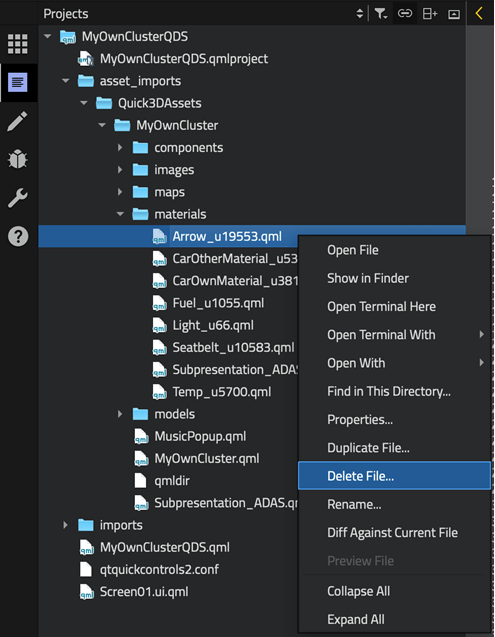
Individual files can also be deleted in the
Projects
view in Qt Design Studio. To delete a file, right-click on it, select
Delete File
, and then select
Yes
.
-
This is the project structure after clean-up.
Finished
You have now converted your Qt 3D Studio project to Qt Design Studio.
